
Creating a truly global storefront involves more than translating content into different languages. It requires configuring locales and regional settings so that every customer — regardless of where they are — receives an experience tailored to their conventions. In Salesforce Commerce Cloud, locales are the mechanism that defines language preferences, currency formats, date and time formats, and other region-specific settings.
What Locales Control
A locale in SFCC governs several aspects of the customer experience:
- Language — the language in which storefront content is displayed
- Currency format — how prices are displayed (symbol position, decimal separator)
- Date and time formats — regional calendar conventions
- Number formats — whether a comma or period is used as the thousands separator
Getting these right is not cosmetic — incorrect formats erode customer trust, particularly in regions with strong conventions around how numbers and dates are written.

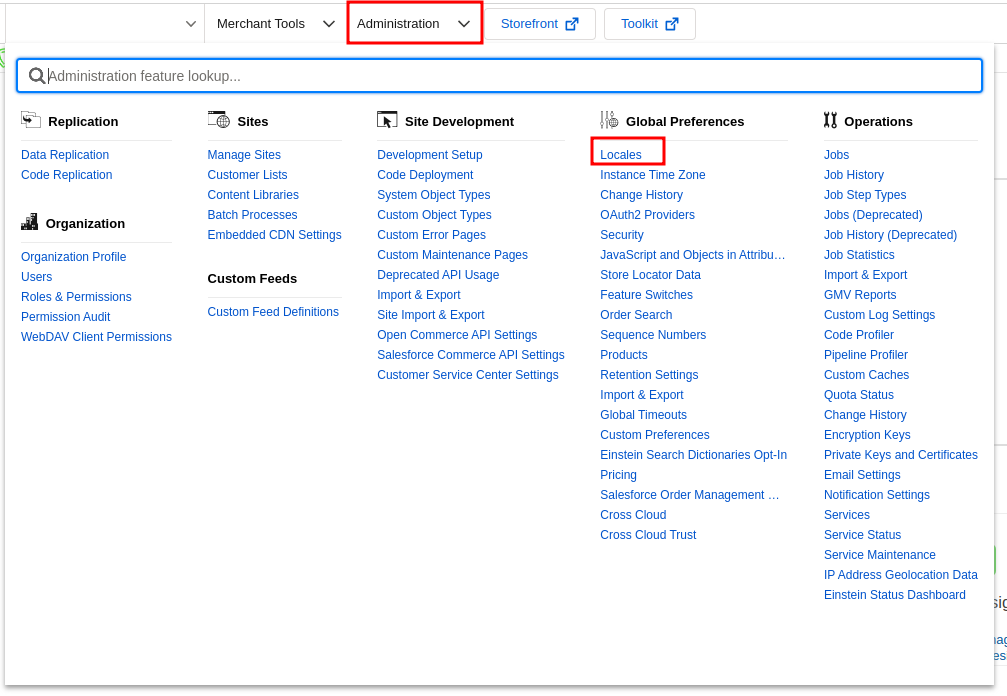
Configuring Locales in Business Manager
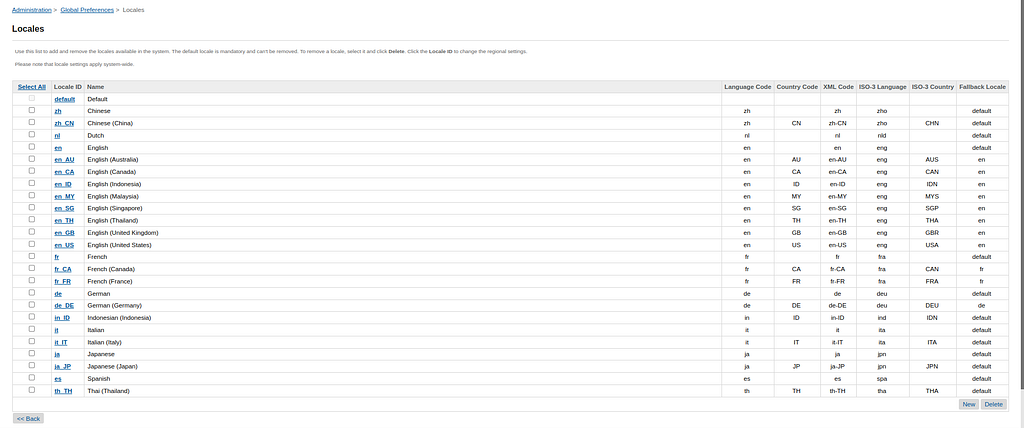
Navigate to the administration panel and access the locale settings. Here you can define and manage locales for each language and region you want to support.
Start by selecting the primary language for your storefront, then configure additional languages based on your business requirements. SFCC provides a comprehensive range of pre-defined locales, so in most cases you are selecting from an existing list rather than building from scratch.
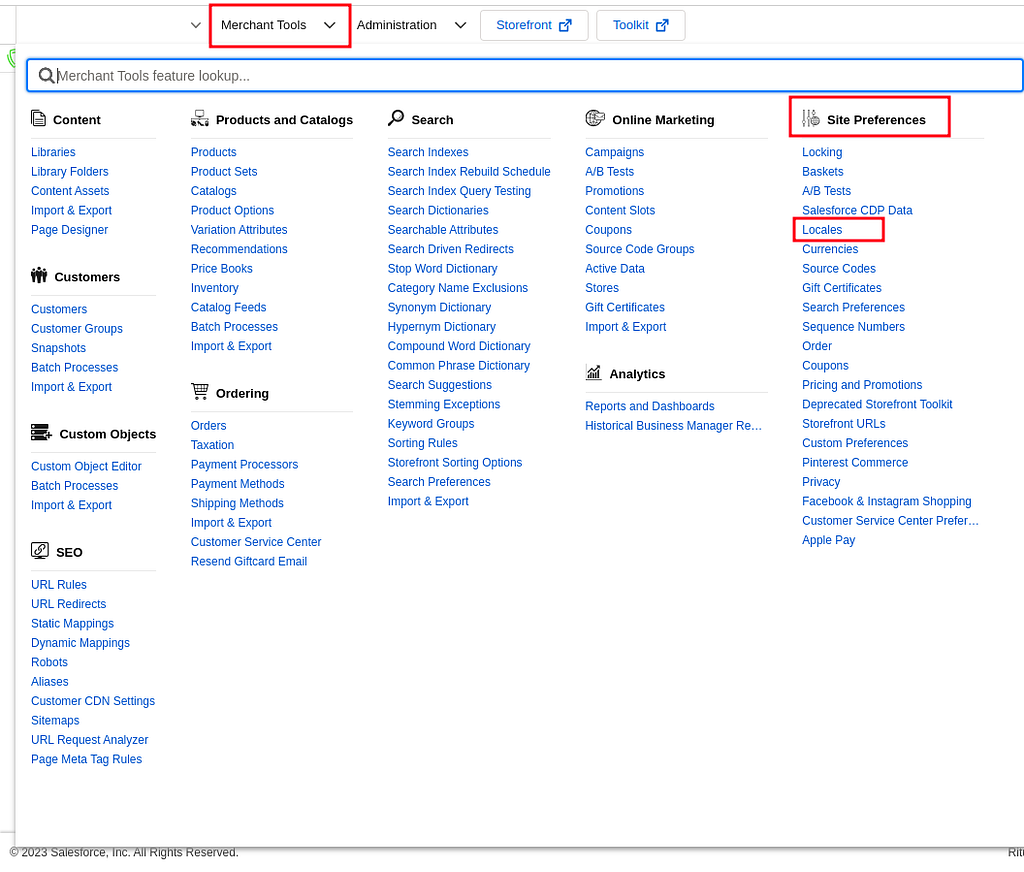
Applying Locales to Your Site
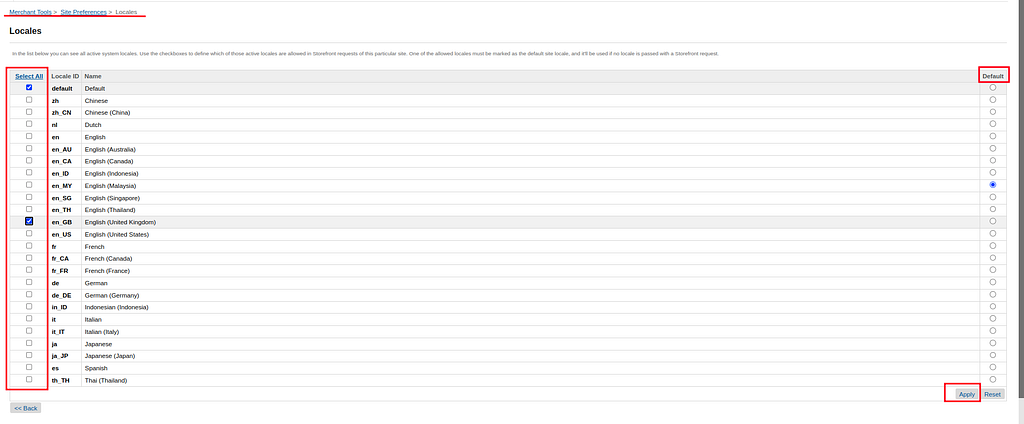
In Merchant Tools, navigate to Site Preferences > Locales. You will find a list of all configured locales. From here:
- Select the applicable locales for your site using the left-hand checkboxes
- Designate a default locale by selecting one from the list and setting it via the right-hand radio button
- Click Apply
Once applied, your site will serve customers from different regions with the appropriate language, currency format, and date/time conventions automatically.
Why This Step Matters
Locale configuration is one of the most foundational steps in an SFCC setup. Doing it correctly early means the rest of your catalogue, pricing, and content work inherits the right regional context. Retrofitting multi-locale support onto a site that was built assuming a single locale is significantly more complex.
What’s Next
In the next part of this series, we will continue configuring the other essentials for a production-ready SFCC storefront — SEO settings, taxation, shipping methods, and catalogue management. Each of these builds on the site and locale foundation established in parts one and two.